Monday, November 11, 2013

HTC One M7 Full HD 1080p Wallpaper (1080x1920, Static)


Pack 02


Pack 03


Pack 04


Pack 05


Pack 06


Pack 07


Pack 08


Pack 09


Pack 10

Part 1: http://www.fshare.vn/file/TWZM7K411T
Part 2: http://www.fshare.vn/file/TWJ9TPMY1T
Part 3: http://www.fshare.vn/file/TFRKBKTK6T
Part 4: http://www.fshare.vn/file/TKYBY7TP0T
Part 5: http://www.fshare.vn/file/T9T1N5NYNT
Part 6: http://www.fshare.vn/file/TNRM8Q8WAT
Part 7: http://www.fshare.vn/file/T0J40V9TBT
Part 8: http://www.fshare.vn/file/TPR5G056ZT
Part 9: http://www.fshare.vn/file/T1GDVA5V1T
Part 10: http://www.fshare.vn/file/TV12N1CSJT


Cài đặt Unofficial AOSP-Based Android 4.4 KitKat trên Nexus 4 & 7

Hiện Nexus 5 là thiết bị đầu tiên chạy Android 4.4 KitKat. Tuy nhiên các thiết bị còn lại, bao gồm Nexus 4, 7 và 10 vẫn còn phải chờ trong vài tuần nữa. Để có thể trải nghiệm trước kẹo KitKat, các bạn có thể dùng bản ROM sau:


Yêu cầu:


Thực hiện:
  • Copy ROM và Google Apps vào trong Nexus
  • Khởi động lại vào recovery
  • Full wipe data, wipe cache, dalvik cache
  • Cài đặt ROM
  • Cài đặt Google Apps
  • Khởi động lại máy và thưởng thức

TWRP Recovery là gì?

Team Win Recovery Project, viết tắt là TWRP là 1 dự án nhằm phục vụ cho những người sử dụng Android muốn cài những thứ đã được custom vào trong thiết bị của họ. Ban đầu TWRP chỉ được sử dụng cho các dòng máy Nexus, sau này mới được lan tỏa rộng ra các thiết bị tablet và smartphone khác.

Interface: Giao diện

Không giống như CWM recovery, TWRP sử dụng giao diện thuần cảm ứng bao gồm các button to, thân thiện và thể hiện rõ từng chức năng trên giao diện.


Install : Cài đặt

Phần này cho phép bạn có thể cài đặt các file zip như: ROM, kernel, theme, mod hay app hệ thống. 

TWRP Recovery Install TWRP Recovery Confirm Flash
Wipe

Chức năng wipe sẽ xóa sạch hết tất cả các phân vùng trên thiết bị Android. Mặc định, TWRP sẽ đề nghị bạn full factory reset (đưa máy về chế độ ban đầu của nhà sản xuất) để xóa sạch những gì hiện có trên thiết bị, bao gồm: installed apps, cache và dalvik cache. Tuy nhiên những dữ liệu còn lại trong SD card hay phân vùng chứa những hình ảnh, video, tài liệu,...

TWRP Recovery Wipe TWRP Recovery Wipe Successful 

Để đồng thời xóa sạch hết những dữ liệu cá nhân: hình ảnh, video, nhạc,... bạn có thể chọn phần Format Data

TWRP Recovery Advanced Wipe TWRP Recovery Format Data
Ngoài ra, phần Advanced Wipe cho phép bạn có thể tùy chọn những phần nào mình cần xóa, những phần nào mình cần giữ lại 

Backup: Sao lưu

Việc thiết lập backup đúng lúc có thể cứu bạn khỏi những rắc rối sau này nếu chẳng may bị mất dữ liệu, bị xung đột hệ thống, ....Và đó là 1 trong những tính năng mà hầu hết các custom recovery đều có (gọi là NANDROID backup)

TWRP Recovery Backup TWRP Recovery Rename Backup

Restore: Phục hồi

TWRP Recovery Restore TWRP Recovery Restore Options

Mount

TWRP Recovery Mount

Settings

TWRP lets you tweak a few recovery-specific settings, such as toggling signature verification for the zip files you flash, using the rm -rf command for wiping instead of the format command, wherever applicable, skipping MD5 generation during backup, enabling MD5 verification of backup files, using military-style time for the clock display, and a simulation mode in which you can test out recovery operations without actually performing them, which is super-useful for those creating custom TWRP themes, in testing them out to ensure they apply properly to all areas of the recovery.
TWRP Recovery Settings TWRP Recovery Select Time Zone
The Time Zone option lets you specify your own time zone for the time display in recovery mode, by choosing it from a list of all global time zones, and optionally specifying any offset if required.
TWRP Recovery Screen Settings TWRP Recovery Lock Screen
To keep things secure, TWRP also comes with a lock screen that activates automatically after a predefined screen timeout period, and can be unlocked with a swipe similar to the unlock gesture on the iPhone, as you can see in the screenshot above. This option can be toggled from the Screen section.
Advanced
TWRP Recovery Advanced TWRP Recovery ADB Sideload
File Manager
Not many custom recoveries come with a built-in file manager, but TWRP has taken things one step further by adding one to the mix. Once you launch it from the Advanced menu, you are shown the file or folder selection screen. Simply navigate to the file or folder you want to manage, and hit the ‘Select’ button. For conveniently locating the required file or folder, you can use the sorting options.
TWRP Recovery File Manager TWRP Recovery File Manager Options
Once a file or folder has been selected, you can then copy or move it to another location, set its permissions to rw-r—r– (755) by using the ‘chmod 755’ button, or to any other permissions you want by using the ‘chmod’ button, delete the item, or rename it. These options can come incredibly handy when attempting to fix things from recovery in case of any issues that have made the phone inaccessible in normal Android mode. However, use these only when you are sure of what you are doing, and don’t mess around with any files that you don’t know much about, or else you might end up harming your OS.
Terminal Command
The Terminal Command mode found in the Advanced menu lets you run a batch file that contains Terminal commands that you want to execute. These files usually have a .sh extension, and if you are unsure about this mode, just let it be, as you won’t exactly need it in that case. For those advanced users who do need to run such a file, TWRP offers the same file selection interface in this section that’s featured in the other parts of the recovery, as we’ve seen above. Simply select the file and you’ll be able to run it right from recovery.
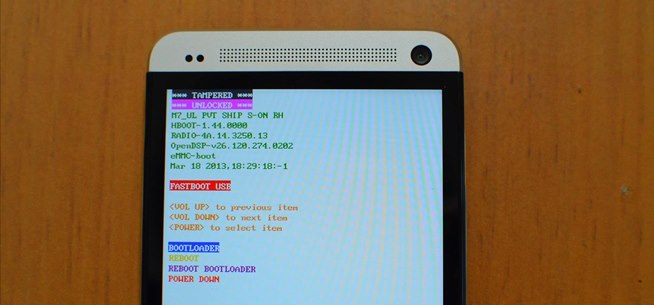
Reboot
This menu provides you with handy options of rebooting your device directly into specific modes right from recovery. The options available include System (normal Android mode), Recovery, and Bootloader (fastboot mode). In addition, you can also directly power your device off from here.
TWRP Recovery Reboot

Sunday, November 10, 2013

Flash Recovery cho HTC One

Để Flash Recovery cho HTC One, đầu tiên, các bạn download 1 trong 2 file này về máy tính

TWRP.img
http://techerrata.com/browse/twrp2/hammerhead

CWM.img
Bản touch: http://www.fshare.vn/file/TNK3WADHXT
Bản bình thường: http://www.fshare.vn/file/TFG7J90GFT

Các bạn copy vào thư mục C:\Android_adb 

Bước 1: Thực hiện Flash

Mở Command Window Here bằng cách giữ phím Shift đồng thời nhấn chuột phải vào màn hình (Hold Shift + Right click)

Thực hiện lệnh theo tuần tự:
adb reboot bootloader   (đưa máy về Fastboot)

Khi máy đã về Fastboot (Màn hình có chữ Fastboot màu đỏ)


Các bạn dùng tiếp lệnh

fastboot flash recovery tên file img tải về

Ví dụ như trong trường hợp này: 

fastboot flash recovery openrecovery-twrp-2.6.3.2-hammerhead.img

hoặc 

fastboot flash recovery recovery-clockworld-6.0.4.4-m7ul.img

Sau đó nhấn Enter, máy đã dc Recovery. Tuy nhiên các bạn đừng tắt vội khung CMD

Bước 2: Kiểm tra xem máy đã được flash recovery chưa

Từ khung CMD đã mở sẵn, các bạn gõ lệnh 

adb reboot recovery

Nếu máy vào phần Recovery như bên dưới nghĩa là các bạn đã Flash recovery thành công.

TWRP :


CWM Recovery:


Saturday, November 9, 2013

Unlock Bootloader HTC One

Unlock Bootloader để làm gì?
--> Unlock boot loader sẽ cho phép điện thoại của bạn sử dụng các bản ROM bào chế (custom ROM). Tuy nhiên, nếu không có nhu cầu thì bạn

Khi unlock Bootloader, bạn sẽ mất quyền bảo hành điện thoại của mình
 ​

Trước khi bắt đầu Unlock Bootloader, nên chuẩn bị các bước sau:
- Bật chế độ Developer Options: Settings --> About --> Software Information --> More --> Nhấp 7 lần vào Build number sẽ xuất hiện chế độ Developer Options
- Vào Settings --> Developer Options --> Chọn USB Debugging
- Vào Settings --> Power --> Bỏ chọn Fastboot
- Download Driver HTC về cài vào máy
- Download Android_adb, giải nén và copy vào thư mục gốc của ổ cài đặt Windows (thường là ổ C)
C:\Android_adb
- Kiểm tra cáp, cổng USB để đảm bảo kết nối tốt nhất và không xảy ra những lỗi có thể ảnh hưởng trong quá trình cài đặt


1. Unlock Bootloader thủ công

Bước 1: Truy cập vào trang web https://www.htcdev.com/register/  đăng ký 1 tài khoản. Sau khi đã đăng ký xong, bạn đăng nhập và vào tiếp link http://www.htcdev.com/bootloader/ để thực hiện Unlock Bootloader

Bước 2: Ngay phần Supported Devicesbạn kéo xuống chọn mục All Other Supported Models.

Click "Begin Unlock Bootloader

[IMG]

Bước 3: Xuất hiện hộp thông báo:

[IMG]
Click chọn "Yes"

[IMG]
Chọn vào 2 ô nhỏ: I acknowledge... --> Click Proceed to Unlock Instructions

=> Next bỏ qua bước các bước từ 1 - và từ 5 - như hình bên dưới:

[IMG]

Bước 4: Vào folder C:\Android_adb trên máy tính, nhấn giữ nút Shift đồng thời click phải vào phần trống trong folder, chọn "Open command window here"
- Kết nối điện thoại với máy tính
- Bắt đầu sử dụng lệnh sau: 

adb devices       (để kiểm tra việc kết nối)


adb reboot bootloader         (reboot về fastboot)


Lúc này bạn sẽ thấy chữ "Fastboot" màu đỏ.

Bạn gõ tiếp lệnh

Fastboot oem get_identifier_token rồi nhấn Enter màn hình sẽ xuất hiện lên 1 loạt mã Code...

Sau đó bạn nhấn chuột phải vào màn hình rồi chọn Mark sau đó kéo chuột chọn toàn bộ phần nằm như hình sau, nhấn tiếp Enter để copy đoạn code đó

** Nhớ copy bắt đầu từ <<<< Identifier Token Start >>>> đến <<<< Identifier Token End >>>>

[IMG]
Các bạn đừng đóng CMD lại 

Quay lại trang web đang ở bước 8, bạn paste phần code vừa copy vào ngay bước 10, click submit.
Đợi khoảng 1 phút, bạn vào Email đã đăng ký ban đầu, download file Unlock_code.bin gởi từ Email của HTC

Quay lại CMD, bạn dùng lệnh 
fastboot flash unlocktoken Unlock_code.bin

Trên điện thoại sẽ xuất hiện thông báo

[IMG]

Dùng phím Volume di chuyển lên "Yes", bấm nút Power để đồng ý

Vậy là đã Unlock thành công Bootloader cho HTC One


2. Unlock Bootloader bằng Tool

HTC One Toolkit 2.0 Squabbi

Trước tiên, các bạn download HTC One Toolkit 2.0 này về máy tính, giải nén ra và chạy file HTC One Toolkit

Các chức năng chính của bộ Tool:
- HTCDev để Unlock Bootloader
- Revone để dùng cho S-OFF/S-ON
- ADB lệnh
- Fastboot lệnh
- Cài đặt file APK
- Cài đặt Driver
.....